Thanks for joining
That’s all done now.
Below, you’ll find the video I promised you.
There’ll soon be a quick welcome message in your inbox.
I’ll make sure you also get a PDF with a link to the video and the notes you see below – that way you can always watch it again whenever you want to.
Thanks for joining.

The Tycoon’s Square
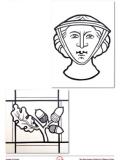
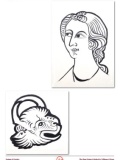
This is a short film about the painting techniques we often use with stained-glass restoration – i.e. making as close a copy of an ancient, broken (or missing) piece as we possibly can.
The film is 20-minutes long. No commentary: the point is for you to see what you would see if you were by my light-box in our studio, watching me paint glass. I’d be focussing on my work, not talking. So this is true-to-life.
But I have added a few notes below the film. (I’ve also included them in the PDF you’ll get.)
Here’s the film:
If you want to download the film, go here.
If you want to download the notes, they’re here, and also in the email I will send you.
Preparation : here I take a quick tracing of the broken glass I want to copy. Nothing exact or overly-careful about this: the original doesn’t need it.
Undercoat : 01:00 : the undercoat is the ground on which I paint. It primes the surface of my glass, preparing it so it will receive your tracing lines far better than I were painting on bare glass. (Of course, I sometimes do trace on bare glass. It all depends.) The undercoat also allows me to highlight (step 3) before I fire. You’ll see the glass I use is uneven: it is hand-made, and thicker at one end, and so it rocks a little when I use my blender.
Tracing : 02:00 : this is the longest section of the film. Here, I do my tracing in one go. This is different from other times when, with the design beneath the glass, I copy-trace the main lines, and then I set the design on one side where I can see it, and go over my lines a second time and strengthen them. But here, as I say: just all in one go. I’ve taken special care to make sure you don’t just see me tracing but also see me load my brush and keep my paint in good shape: really important. The result: my paint flows slowly and just where I want it to – I’m in complete control. Also notice how I mostly trace with the tip of my brush.
The Highlights : 10:00 : This is a piece of restoration – I must copy the smashed original. That’s why, to do my highlights, I just use my hands, because it seems to me that’s how the original was done: no highlights with a pointed stick, just with my hands. The technique: I gently rub. Now the paint must have quite a lot of gum Arabic in it (or it would come off too easily), which is another reason why, when I trace, my paint flows beautifully: the gum Arabic actually holds the line together. I love highlighting, when the light suddenly breaks through … Also, because I’m using hand-made glass with texture / bubbles in it, the effect is stunning.
Texture On The Back : 12:40 : So now I clean the back of the glass – I really should have done this before I started – and I lay down a wash of paint (another undercoat) at the same time, and blend it. When the paint is absolutely dry, I load a soft-haired toothbrush with paint, and spray paint on. When the spots are dry, I rub them gently with my finger: this lifts off part of the undercoat, and leaves some of the spots: a delicate effect which helps my glass look older.
First Firing : 14:40 : This is a “paint” firing: about 660 Celsius (1220 Fahrenheit).
Silver Stain : 14:50 : Oil, yes oil, not water. Various oils in fact. Sandalwood Amyris and Lavender – I describe the whole process in a separate e-book and also in our film, The Heraldic Arms of Hampton Hall. Oil is far more economical than water: it dries out really slowly than water, and so you loose less. You can also apply it exactly where you want it: no tidying up or waste or mess. Just you see how much control I have with oil. It’s amazing, truly wonderful. And the colour is gorgeous. (You always have to test it though.)
Second Firing : 20:10 : This is a “stain” firing. The exact schedule depends on many things, but especially on the particular glass you’re using. (That’s why I say you always always have to test it.) The top temperature is normally around 560 Celcius (1040 Fahrenheit). After firing, you clean off the dried residue. And, if your tests were reliable, you now reveal a gorgeous golden piece of painted glass.
Thanks for reading and watching: enjoy the blog and newsletters!